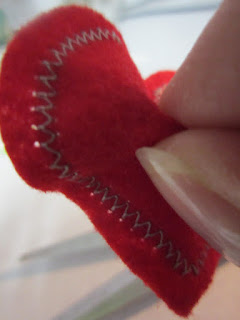
Crafty mommy whipped up some all felt barrettes about a week ago
but I was disappointed in the stretching &
loose threads that happened relatively quickly.
After all, we may be on the girlie side among the guys at the RF house---
but we still play hard.
Here's a tutorial for the new & improved heart embellishment for
your Valentine's viewing pleasure.
*Supplies for heart shaped barrettes, pins, headband adornments & bookmarks*:
2.5" fabric strips or scraps & inexpensive felt
barrettes only: clip barrettes {I keep them on hand, they're perfect f
or holding binding in place & purchase regularly at Dollar General (US) at 12 for $1}
pins only: I recommend small safety pins, these are very light & don't require much support
headband adornments: I hand stitch with a quick whip stitch.
The teeth of the firm headband keep in place.
Can be thoroughly attached to soft headbands in several places,
just be sure to check placement due to band stretch.
__________________________________________
Today, I'll be showing you the processes of bookmarks & barrettes
and will include tips for the other methods along the way.
As always, if any clarification is needed, just ask. I'm happy to help out.
__________________________________________
Finger press your scraps or strips in half.
Cut out your heart shape...if you're making the barrettes, be sure to check
that the width can hold the full length of your clip barrettes,
allowing room for your stitches.
Once you're happy with the size and shape of your heart,
cut additional hearts the same size
& set your machine to a small zig zag stitch in preparation
for some raw edge applique.
Beginning at one of the curves, slowly zig zag around your fabric scrap heart,
stopping to adjust & pivot at the point.
Continue around until you meet at your initial stitches.
Clip your threads.

If you're making a bookmark, trim the edges
{some stretching may occur}& you're finished!
Wasn't that easy?
For those of you moving on to embellishments, trim your hearts with shears,
leaving as much felt exposed as you like.
Next, we'll be adding barrettes for this tutorial.
 Pinch the fabric from either side and pull apart so you don't accidentally cut through the front side.
You'll only cut the felt in this project.
{Cut a second hole in the same manner for pins at this stage}.
Insert your open barrette top portion in the hole.
If it is a tight fit, clip a bit more off so it easily slips in and out.
Your hearts can be switched out for other felt/fabric shapes
without purchasing additional clips. =)
It will stay in place, as long as hair holds the clip
{baby fine hair may require a ponytail first}.
And there you are. Your clip, barrette, embellishment or pin.
Now you just have to make another dozen or so for every friend in class!
Oh, and get started on the 4 leaf clover ones for St. Patty's Day, too.
Enjoy!
Heather


Happy Valentines day and thank you for sharing at my blog!
ReplyDeletePlease be sure to visit my new "Learning Center" at http://quiltinggallery.com/learning-center/
Beautiful hearts <3
ReplyDeleteElisabeth